Rust Journey – Chip8 Emulator – Day 2

I got momentum and started implementing the other opcodes. I ended up with a messy code, a giant switch where everything happens.

I need to take the time and do a proper refactor to it. I still thinking about how I am going to implement it and the lack of free time is not helping much.

I also added the default font sprites at 0x50. But didn’t find any ROM that actually uses it.

Not much to show or tell about, but as soon as I finish the refactor, I am going to post an update. The progress can be checked on the chip8 emulator repository.

Rust Journey – Chip8 Emulator – Day 1

Continuing my quest for learning Rust, I elaborated a list of potential projects. I started a couple privately but then I found the suggestion of creating a Chip-8 emulator somewhere. Unfortunately, I don’t remember where it was.

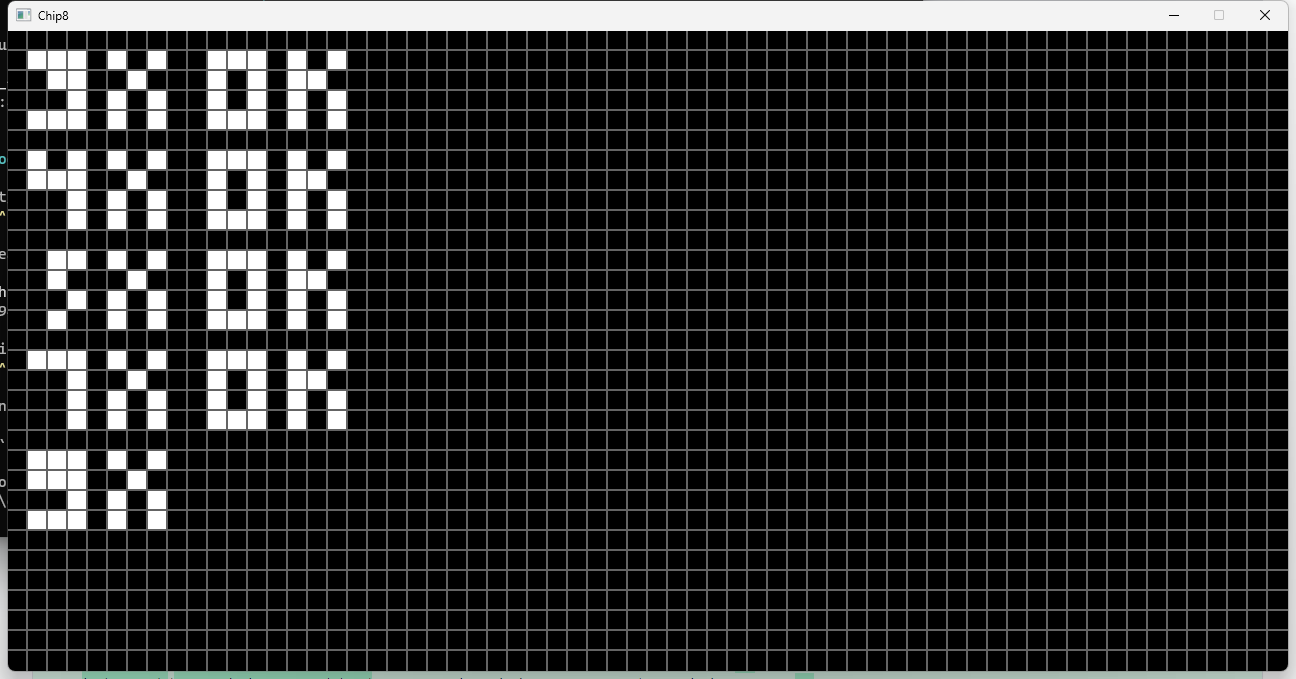
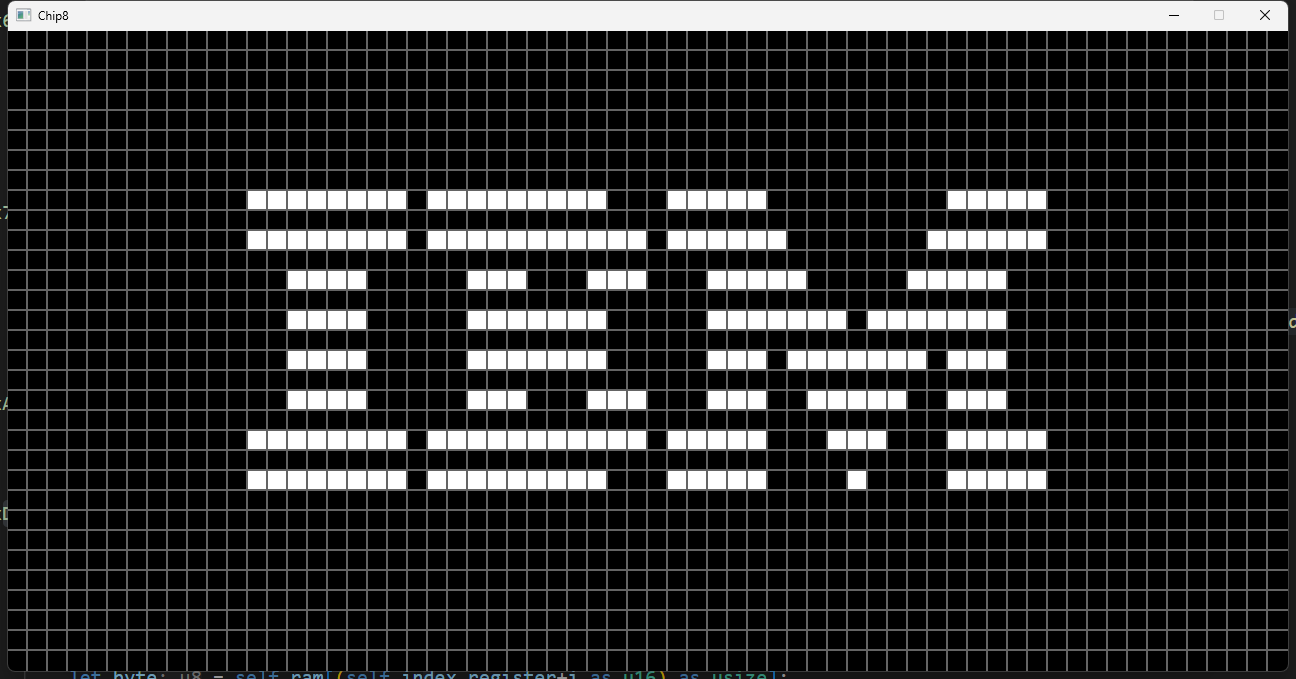
I started reading about the programming language and consumed resources like CHIP-8 Classic Manual, Cowgod’s Chip-8 Technical Reference v1.0, and Guide to making a CHIP-8 emulator. The latter kind of ruined the experience because it explains it so well, it also suggested implementing the opcodes needed to get the IBM Logo ROM running. Speaking of ROMs, I got a set cloning this repository.

I started with my code reading the ROM file to a byte vector and the basic rendering window. Then I started creating variables for the program counter, the RAM, the registers, and the stack. I proceeded to wrap these variables in a struct and added the call_operation function.

The display opcode was quite fun to implement, I first used SFML Rectangles directly but then moved to use a multi-dimensional array. Oh, and my bitwise operations to extract the bits from the sprite were inverted, so it caused some confusion.

As usual, there is a lot of improvement and refactoring to be done. I like to start with a dirty proof of concept and then work on it, but the call operation needs some serious refactoring and the display can be done directly to SFML Image/Texture.

I can’t deny it was a satisfactory experience since I never did something like it. Similar to other projects that I created and that are not web-related.

Except for reading files in binary form, there is nothing new regarding Rust in this project. I also need to practice writing unit tests during the development process.

Rust Journey – Snake Clone – Day 6

As I mentioned in my last post, I’ve had some really busy weeks – actually, it’s been busy for months now…

I was still contemplating whether to transition to another project since we had pretty much accomplished all the challenges and goals for this one. But in the end, I decided to continue and incorporate both graphics and sound.

I began by creating a sprite sheet and then proceeded to load the textures. Within just a couple of minutes, I managed to transform the food item rectangle into a sprite, and from there, I updated the snake graphics and later, the wall graphics. I also added a subtle sound effect for when the food item is consumed.

The entire process was fairly straightforward and uncomplicated; the only challenging part was ensuring that some segments’ rotations were correct (e.g., graphics for movements from Left-Top needed to be rotated 180 degrees in comparison to Top-Left movements).

With the project now considered complete, I’ve posted it on itch.io. You can check it out by clicking here. I’ve also updated the code on its GitHub repository.

I already have a few ideas for my next projects and will be sharing them here soon!