Back in 2009, I became aware of the existence of Arduino(through TuxRadar Podcast). The idea of open hardware and open software platform aroused my interest in electronics.
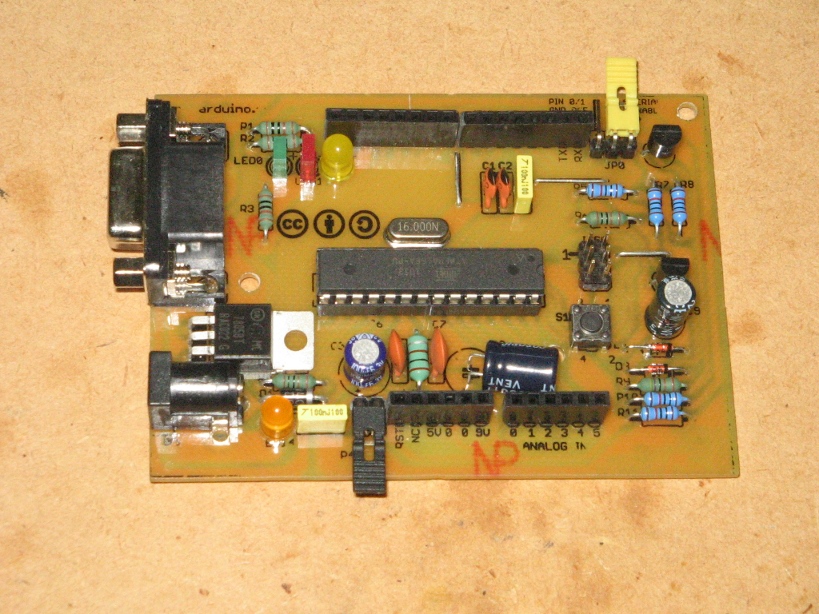
I got myself a kit and built a Serial RS232/DB9 board. That was my first soldering experience and really started my relationship with electronics as a hobbyist. Soon after, I got a counterfeit Arduino Mega from China and my Serial one was put aside.
This weekend I was testing a sketch and it was incompatible with Arduino Mega. Unfortunately, I was unable to find the right drivers for my serial adapter. Enough story, I ran into a few issues and here is a checklist to avoid them:
Don’t forget a 10μF cap between Reset and Ground.
External PSU, don’t rely on the programmer’s 5V.
Check USE_OLD_STYLE_WIRING constant on ArduinoAsISP sketch (when not using the ICSP header).
Install MiniCore boards on your Arduino board-manager (Check MiniCore GitHub for more information)
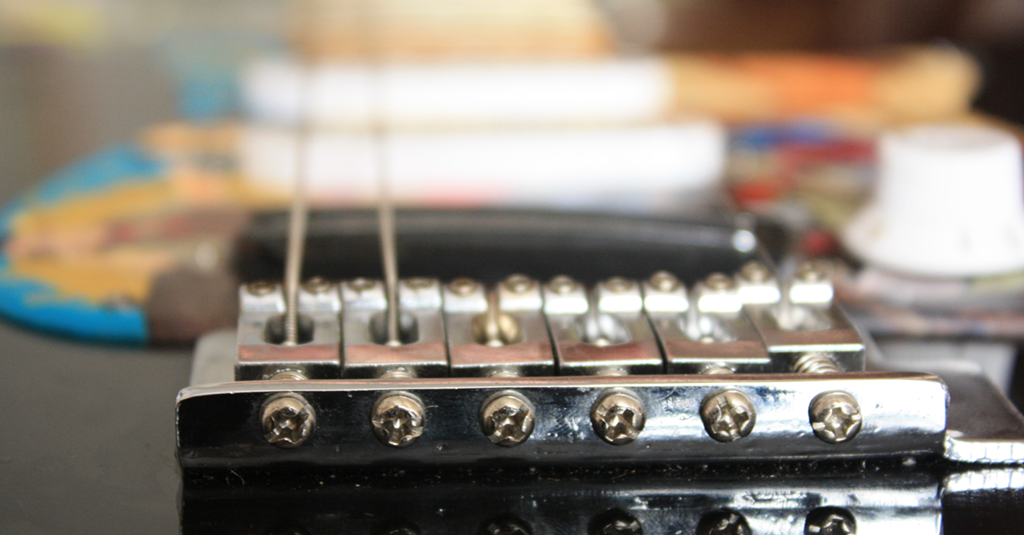
A friend lend me his electric guitar for quite a while when I determined to learn a string instrument. After a lot of months I finally got my act together and bought a cheap an inexpensive electric guitar bundle(with a 15-Watt amplifier, gig bag and strap).
After a period of time it occurred to me to experiment, modify and change some aspects of the guitar wiring. All the applied modifications were found over the internet and, as you can imagine, there is nothing innovative.
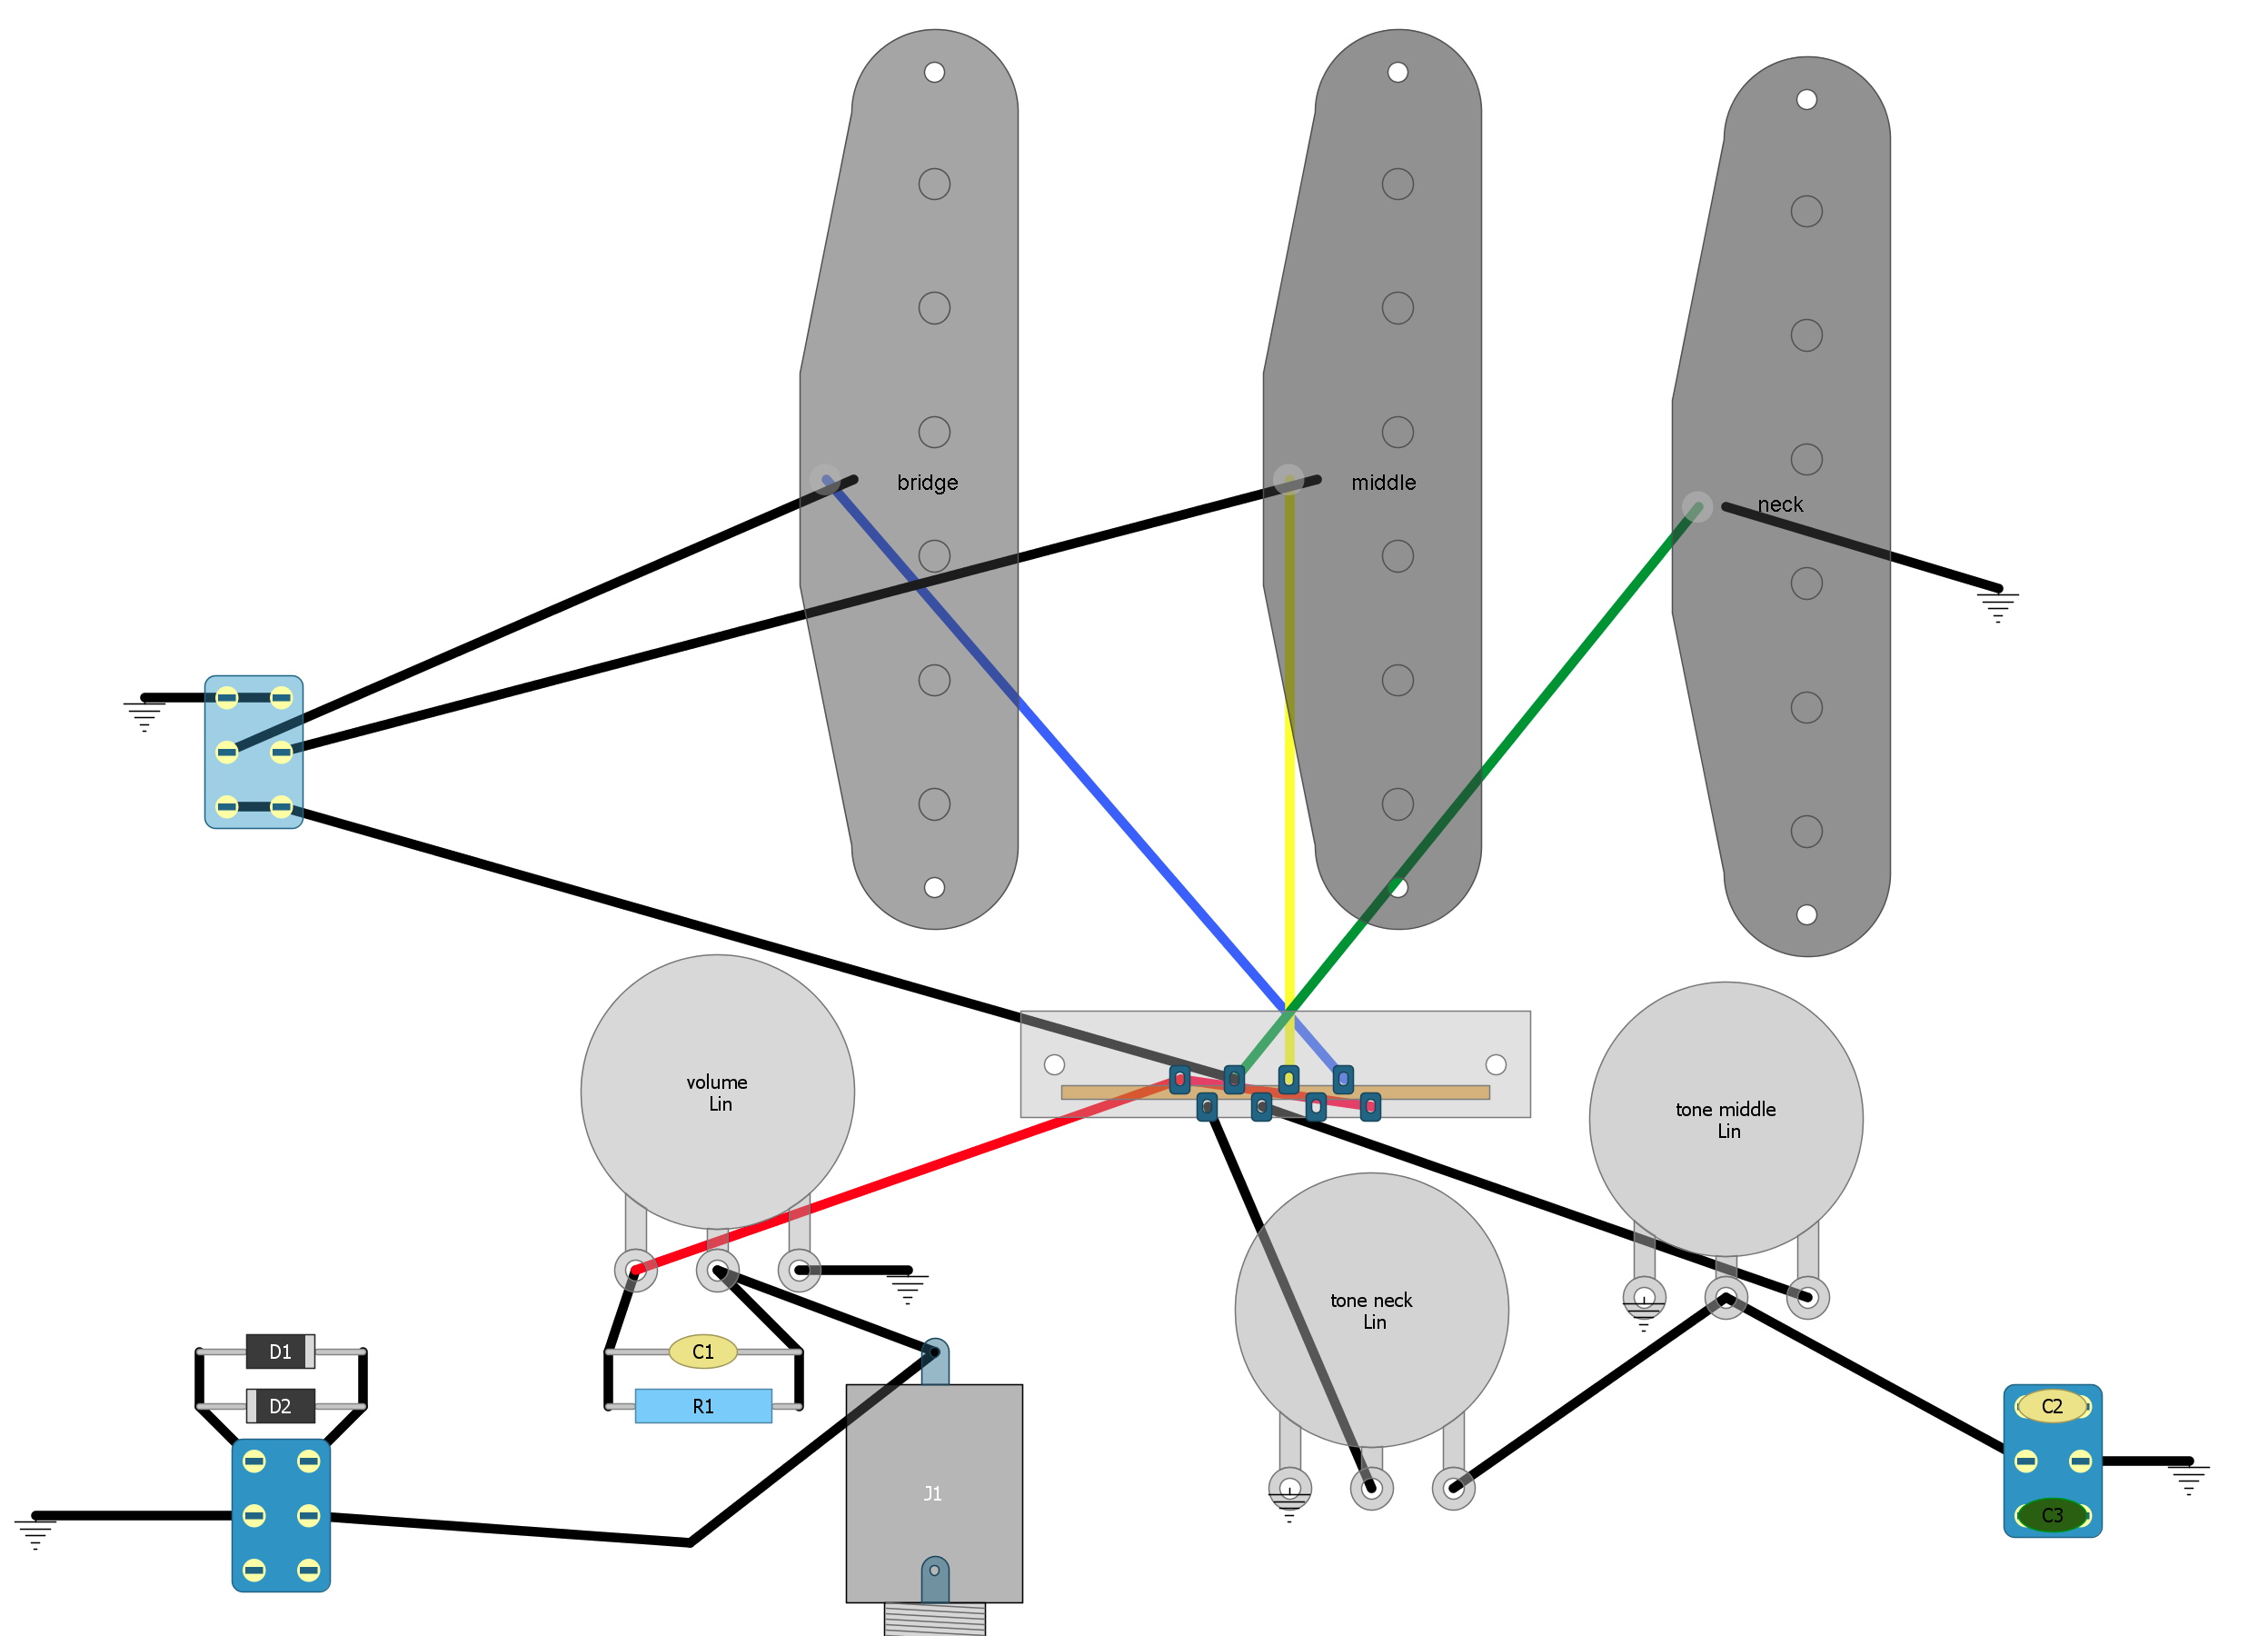
Modifications:
Switch between the original tone capacitor and a new one.
Hard clipping using two diodes connected in antiparallel.
Neck ON Switch (David Gilmour wiring).
Treble bleed mod.
Motivation
It was a cheap guitar, however its value reflects its quality. I was a bit unsatisfied with its tone, with a little research I found out some ways to improve the tone.
Switch between the original tone capacitor and a new one
Simple selector between two capacitors. The second one helps to get a darker sound and not so strident like Stratocasters usually are.
Hard clipping using two diodes connected in antiparallel
Sometimes called as “passive distortion” or even wrongly as “passive overdrive”, it’s a fun modification. Gives a harsh sound, but loses volume since it clips the sound without any boost.
Neck ON Switch (David Gilmour wiring)
This wiring, when enabled, connect the neck pickup with whatever selection in the 5-way switch. David Gilmour may be the most famous musician to use this mod. Now with up to 8 possible combinations, the guitar has so much possibilities. In my opinion, the sound is colorful now.
Treble bleed mod
When you turn the volume down on a guitar you can feel that the sound loses a bit of treble. It happens because the pickup, the volume potentiometer and the capacitance in the cable act as a low pass filter. To compensate this loss we “bleed” more treble into the signal as the volume is turned down.
Further modifications
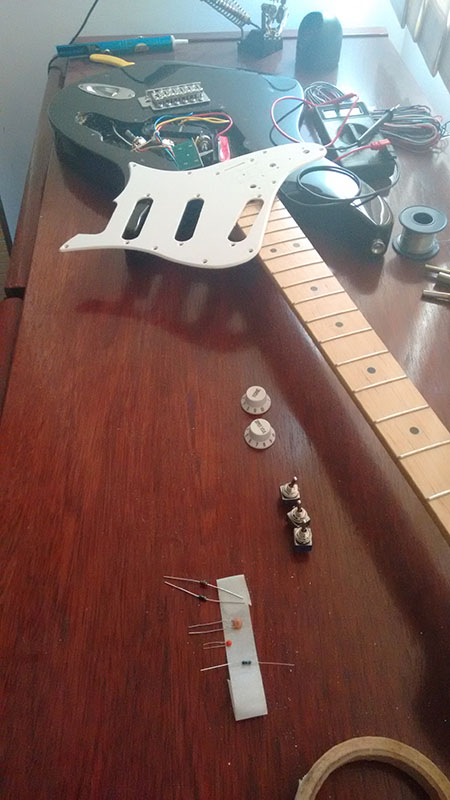
After all that, I ordered and installed a hotrail pickup in the bridge position. Unfortunately I don’t have any pictures, but If I did it again today I would use the Gilmour/neck mod with the bridge pickup instead of neck. I customized the pickguard with an artist, that being the subject of the Part II of this post.
Conclusion
I learned a lot in the process. From something stupid like how a 5-way switch works to something unexpected like fixing to a stripped screw hole.
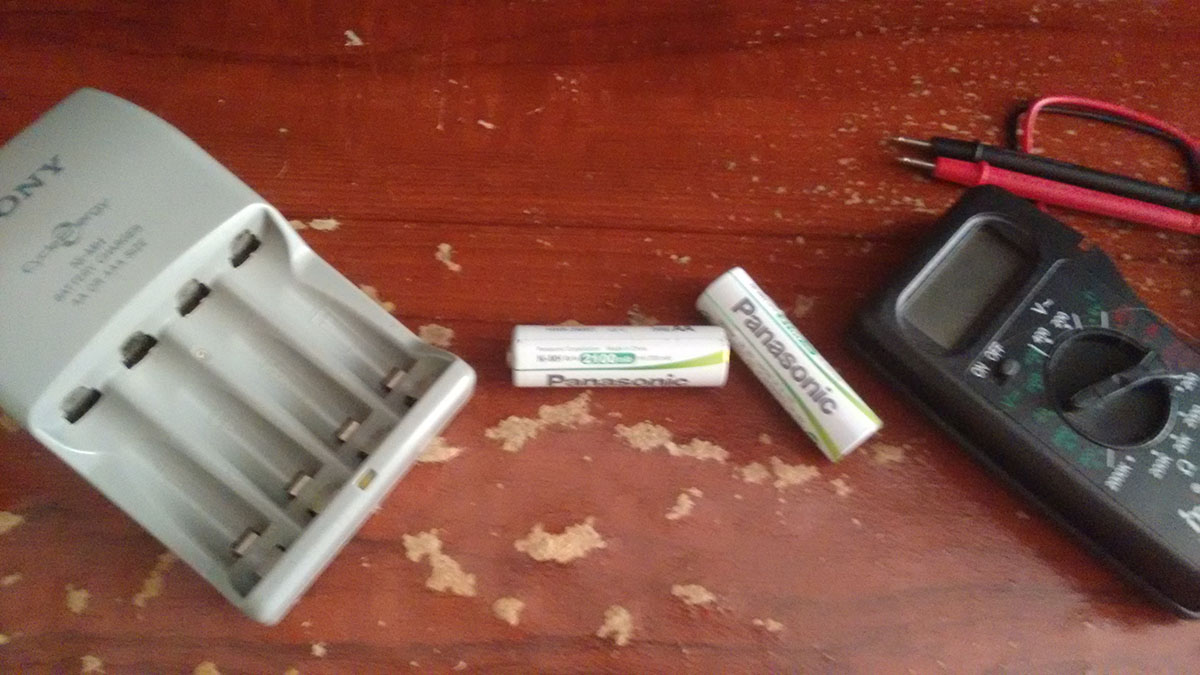
I’m using the Microsoft Desktop 800 for almost 4 years. In an effort to reduce the E-waste I’m using rechargeable batteries. Unfortunately two of them just died a couple of weeks ago, it occurred to me to find a way to recover them. After some time reading I found a way to bring them back to life and I will tell a little about that.
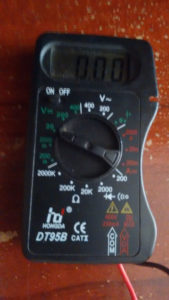
First try charging your batteries two or three times, if they still don’t charge up, you can check with your multimeter in the dc voltage setting. You should get a value like 0 volts, but I read somewhere that some chargers start charging after some threshold, so you may read something below 0.8 volts.
After you make sure that your batteries are dead, you can try the procedure. Do this the same way you do with a car battery, connect the negative terminal of one working and fully charged battery to the negative of your dead one and do the same with the positive terminals. Keep them connected for 20 to 30 seconds. I used my (unplugged) charger and a coin as the negative are a common ground.
With a full charge I got a 1.38 volts reading and my two batteries working again.